We've had plans (practically since we moved into our new house) to build Anna a bed. The daybed she had was just not working -- it was way too big for the space and there wasn't much room for anything else. So we talked about possibilities. Fortunately, I am married to a man who can design furniture and build it (without spending a fortune)!
Our first decision was what to put in the room. We wanted something that could incorporate several pieces of furniture with a small footprint, since her room is not very big. She wanted her giant dollhouse to stay, plus she had to have her dresser in there as well. The last item on the list was a bookcase. Anna loves to read, so she needed a place for her ever-growing collection of favorite books.
Now that we knew what had to be in the room, it was time to come up with a plan. I suggested a daybed under the window, with bookcases built into either side. Ultimately, we went with Jason's plan of a loft bed with the dresser and bookcase underneath, leaving space for a little reading nook/play area under there too. It included everything we wanted, plus the space it would take up would be much less than all three pieces of furniture separately.
We researched the beds online, and found them to be anywhere from $800-$1800. But our DIY version? About $25. Yep, just $25. All we really had to buy was the lumber. We had the dresser and bookcase and the paint for the bed.
So how did we (and by we I mean Jason) do it?
Step one was the design process. After we decided on a plan we liked, we went to Lowe's and bought our lumber. Next up was building the bed frame and support legs. It was a basic layout of 2x4s with a plywood top.

After he built it in the basement, we brought it up to Anna's room for a test fit.

You can see her brother's dresser underneath (her white one and this brown one are the same size). We wanted to make sure everything would fit where it was supposed to.
We brought it back downstairs after that and painted it.
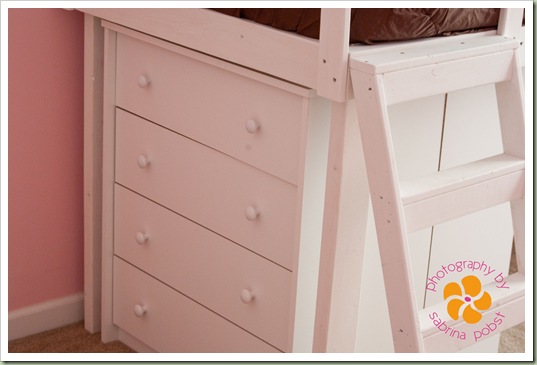
The next step was the rails and ladder. Both were constructed from 1x3 furring strips. Everything was reinforced and braced, and is very, very sturdy.

After we painted the rails and ladder, we set it up in Anna's room. The next step was to add the mattress and bedding, as well as the dresser and bookcase underneath. Here's the finished product. We're definitely proud of it!

I don't have an 18-55mm lens for my DSLR, so I had to stand outside the room to get the shot above. You can see the wall next to her closet blocking the view of the dresser. Here's what the dresser looks like underneath the bed . . .
and here's a view of the bookcase (facing the other way) . . .

She's got about a 4x3 area underneath, where we hope to put a beanbag chair or big pillows for her to sit on. All in all, this project turned out very well. And for only about $25, you can't beat it! :)