1.09.2011

The Basement

Part one of our three part basement series will focus on the classroom/arts and crafts room.  We were in major need of a redesign in this room, because the arts and crafts area was getting really junky.  Plus, it was hard to find what you were looking for because the supplies were not very organized.  On Friday, the kids and I bought two new bookcases ($15 apiece at Walmart) to match the one we already had.  Jas put them together for me yesterday while I was out of town, and today I worked on the room. 


The only thing that stayed put was the computer desk, as seen in this photo.  Note the abnormally large 32" lcd tv that we're using as a computer monitor.  Love it!
 
IMGP9052 copy


The first thing I did was to move everything out of the space, so that I could move our work table to the west wall.  There's more light over there, plus both kids will have a direct view of the whiteboard. 

IMGP9053-2 copy


Jas attached a clothesline for me across this wall, and we bought some brightly colored clothespins for the kids to hang up their artwork.  The cool thing is, they can change their artwork out anytime they want -- it's super easy!

IMGP9051-2 copy


 The wall with the board and calendar, etc. did not change much, except the two rolling carts with their art supplies were moved to that wall.

Day 9


The north wall now has all the school books, supplies, and all the other arts and crafts supplies (including all the paper).  Everything has its own designated space, and the kids have been taking advantage of this to do lots of artwork this afternoon.  The space turned out great if I do say so myself!  We can't wait to use it tomorrow morning for school!


**Stay tuned for a post on Jason's room, plus the rest of the basement.

12.28.2010

Happy Anniversary!!

House anniversary, that is.  Today (December 28) is our one year anniversary of being in our new house.  A year ago today, Jill came to the house armed with Dr. Peppers and Reese’s Peanut Butter Cups, ready to help the kids and I “get moving”. :)  And move we did.  By the afternoon, Halter Gas was here with the LP and hooked the water heater and furnace up.  Heat and hot water meant we could sleep here!  That was an unbelievably awesome feeling, and it is so nice to look back on that date today and think about how far we’ve come in a year.  We still have the landscaping and deck to do, as well as a small storage building, but those are already in the works for this spring and summer. 

So we’re pleased as punch to be celebrating our one year anniversary.  And having finally received our first time homebuyers tax credit (plus interest) in the mail yesterday from the IRS makes this anniversary even sweeter! :)  Yes, it finally came and we have big plans for it.  So look for plenty of landscaping and outdoor projects once warmer temps roll in a few months from now.  We can’t wait to get started!

12.15.2010

An important anniversary

One year ago today, this was happening:

The House Arrives!

Click on the link and reminisce with us today.  As I’ve said many times before, I would not change a thing about this house.  I love it all.  And I can remember seeing the back half of the house coming down the road, and being so excited to see it for real.  Not just on a two-dimensional floor plan, but see it in real life.  Words cannot describe it.

So take a walk down memory lane with us today.  :)

8.15.2010

A bed for Anna

We've had plans (practically since we moved into our new house) to build Anna a bed.  The daybed she had was just not working -- it was way too big for the space and there wasn't much room for anything else.  So we talked about possibilities.  Fortunately, I am married to a man who can design furniture and build it (without spending a fortune)!

Our first decision was what to put in the room.  We wanted something that could incorporate several pieces of furniture with a small footprint, since her room is not very big.  She wanted her giant dollhouse to stay, plus she had to have her dresser in there as well.  The last item on the list was a bookcase.  Anna loves to read, so she needed a place for her ever-growing collection of favorite books. 

Now that we knew what had to be in the room,  it was time to come up with a plan.  I suggested a daybed under the window, with bookcases built into either side.  Ultimately, we went with Jason's plan of a loft bed with the dresser and bookcase underneath, leaving space for a little reading nook/play area under there too.  It included everything we wanted, plus the space it would take up would be much less than all three pieces of furniture separately. 

We researched the beds online, and found them to be anywhere from $800-$1800.  But our DIY version?  About $25.  Yep, just $25.  All we really had to buy was the lumber.  We had the dresser and bookcase and the paint for the bed. 

So how did we (and by we I mean Jason) do it?

Step one was the design process.  After we decided on a plan we liked, we went to Lowe's and bought our lumber.  Next up was building the bed frame and support legs.  It was a basic layout of 2x4s with a plywood top.

 IMGP8442001

After he built it in the basement, we brought it up to Anna's room for a test fit.

 IMGP8462001

You can see her brother's dresser underneath (her white one and this brown one are the same size).  We wanted to make sure everything would fit where it was supposed to.

We brought it back downstairs after that and painted it.

The next step was the rails and ladder.  Both were constructed from 1x3 furring strips.  Everything was reinforced and braced, and is very, very sturdy.

 IMGP8466001

After we painted the rails and ladder, we set it up in Anna's room.  The next step was to add the mattress and bedding, as well as the dresser and bookcase underneath.  Here's the finished product.  We're definitely proud of it!

 IMGP8485001

I don't have an 18-55mm lens for my DSLR, so I had to stand outside the room to get the shot above. You can see the wall next to her closet blocking the view of the dresser.  Here's what the dresser looks like underneath the bed . . .
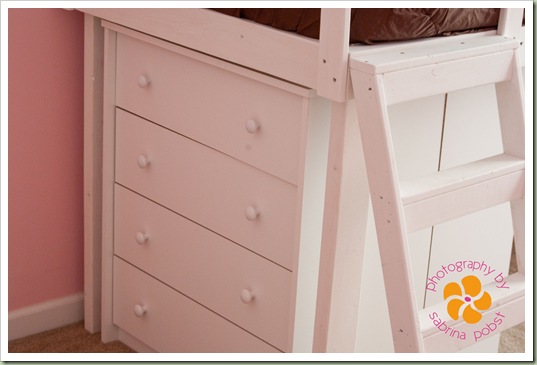
 IMGP8486001

and here's a view of the bookcase (facing the other way) . . .

IMGP8488001 

She's got about a 4x3 area underneath, where we hope to put a beanbag chair or big pillows for her to sit on.  All in all, this project turned out very well.  And for only about $25, you can't beat it! :)

6.19.2010

House photos

Our plan, after we get our landscaping done, is to have our main entrance be the front door.  For now, though, everybody's using the side entrance.  The first thing you see when you come in that way is the laundry room.

IMG_0152

I'm loving the laundry sink, the broom closet, and all the storage.  It's really a far cry from what we had before.

Anna's room and Connor's room are on the left as you come down the hall.  I didn't get a photo of those two, mainly because the kids were playing and had large messes of toys out in their rooms. :)

Their bathroom is on the right.  It's great having two bathrooms, and I'm so glad we finally have that.  Four people sharing one bathroom is just too much!

IMG_0153

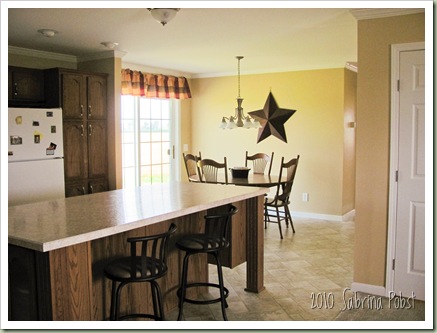
As you walk the rest of the way down the hall, you come to the open kitchen/dining/living area.  We love having it all open -- it works great for entertaining, and even every day.  It's the main hub of the house, and the place where we spend the most time.

IMG_0154

IMG_0155

IMG_0156

The door you see in the corner of the above photo is to the basement.  The photo below shows the view back down the hall to the laundry room.

IMG_0157

Our master bedroom is on the other side of the living area.  It has loads of natural light (just like the rest of the house) and has a large walk-in closet.

IMG_0158

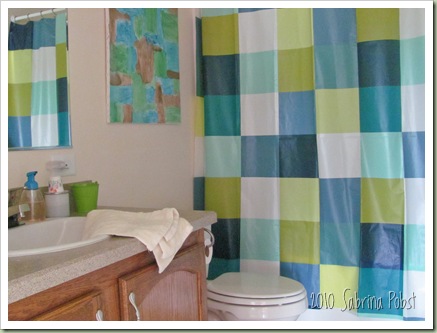
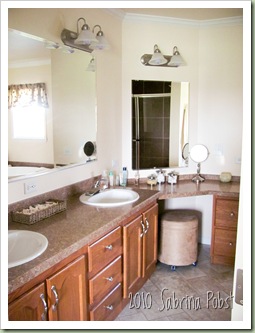
The master bath is attached to our room, and it's huge!! It ended up being much bigger than we realized, but well worth it. 

IMG_0160 In this photo you can see my vanity area, which was an added perk I wasn't expecting!

IMG_0161 IMG_0162

IMG_0163

Well that's it for the inside.  Basement photos have been hard to take because of the lighting, but I'll get some uploaded here as soon as I can.

We love the house, and as we approach our six-month anniversary there is nothing we would change about it.  Obviously, all our months of planning and decision-making paid off.  We ended up with a house we're totally crazy about! :)

6.07.2010

What's This?? A House Tour?

You got it, folks!  I have 2 videos for you today.  The first is a virtual tour of the main level of our home.  The second is a tour of the basement.  (Keep in mind that the basement is still a work in progress!)

I shot these yesterday with our new HD pocket video camera.  I'm constantly moving the camera (obviously, since this is a walking tour!) so it's a little jumpy from time to time.  But if you haven't been able to see the house yet, now's your chance! :)

Hope you like it!

6.02.2010

Mowing Already??

Yes, we are.  Well, technically Jason is.  He mowed for the first time a couple of weeks ago, and then again last Friday.  We had plenty of weeds growing up in the front yard, so Jas set the mower deck up as high as it would go and took care of the weeds.

IMGP8168

Last Friday when he mowed, some of the grass we had planted had grown tall enough to be mowed.  Yay!  We still have a few small bare spots, but Jas plans to re-seed the whole yard this fall and take care of that. 

Now we're getting ready to start our patio and landscaping. :)  I can't wait!